Looking Forward to a New Year

Well, this year has been a bit of a challenge. I do realize that this is a huge understatement, but then this is how one starts these things sometimes. When the world started turning upside down last March who knew we would still be living in a continuing alternate reality for this long. It certainly pitched things over here in Railroad Town and we have all learned that we need to adapt to and embrace change and learn new ways to move forward.

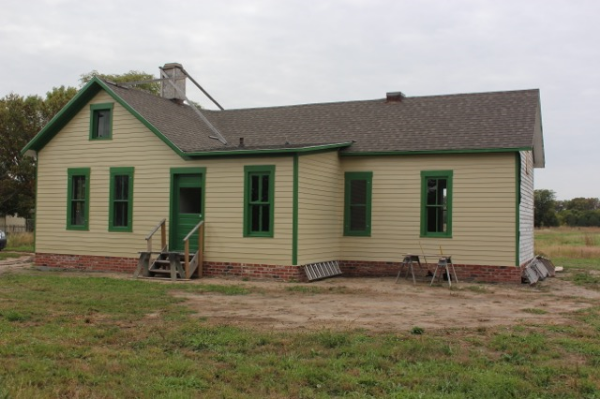
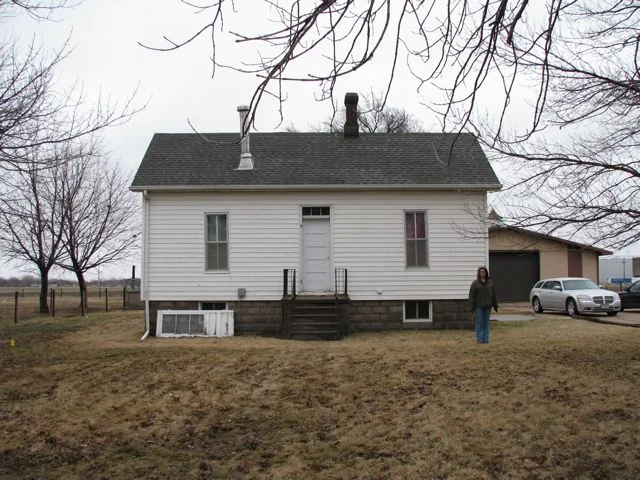
But enough about all this - What’s been happening at the Peter Stuhr house?

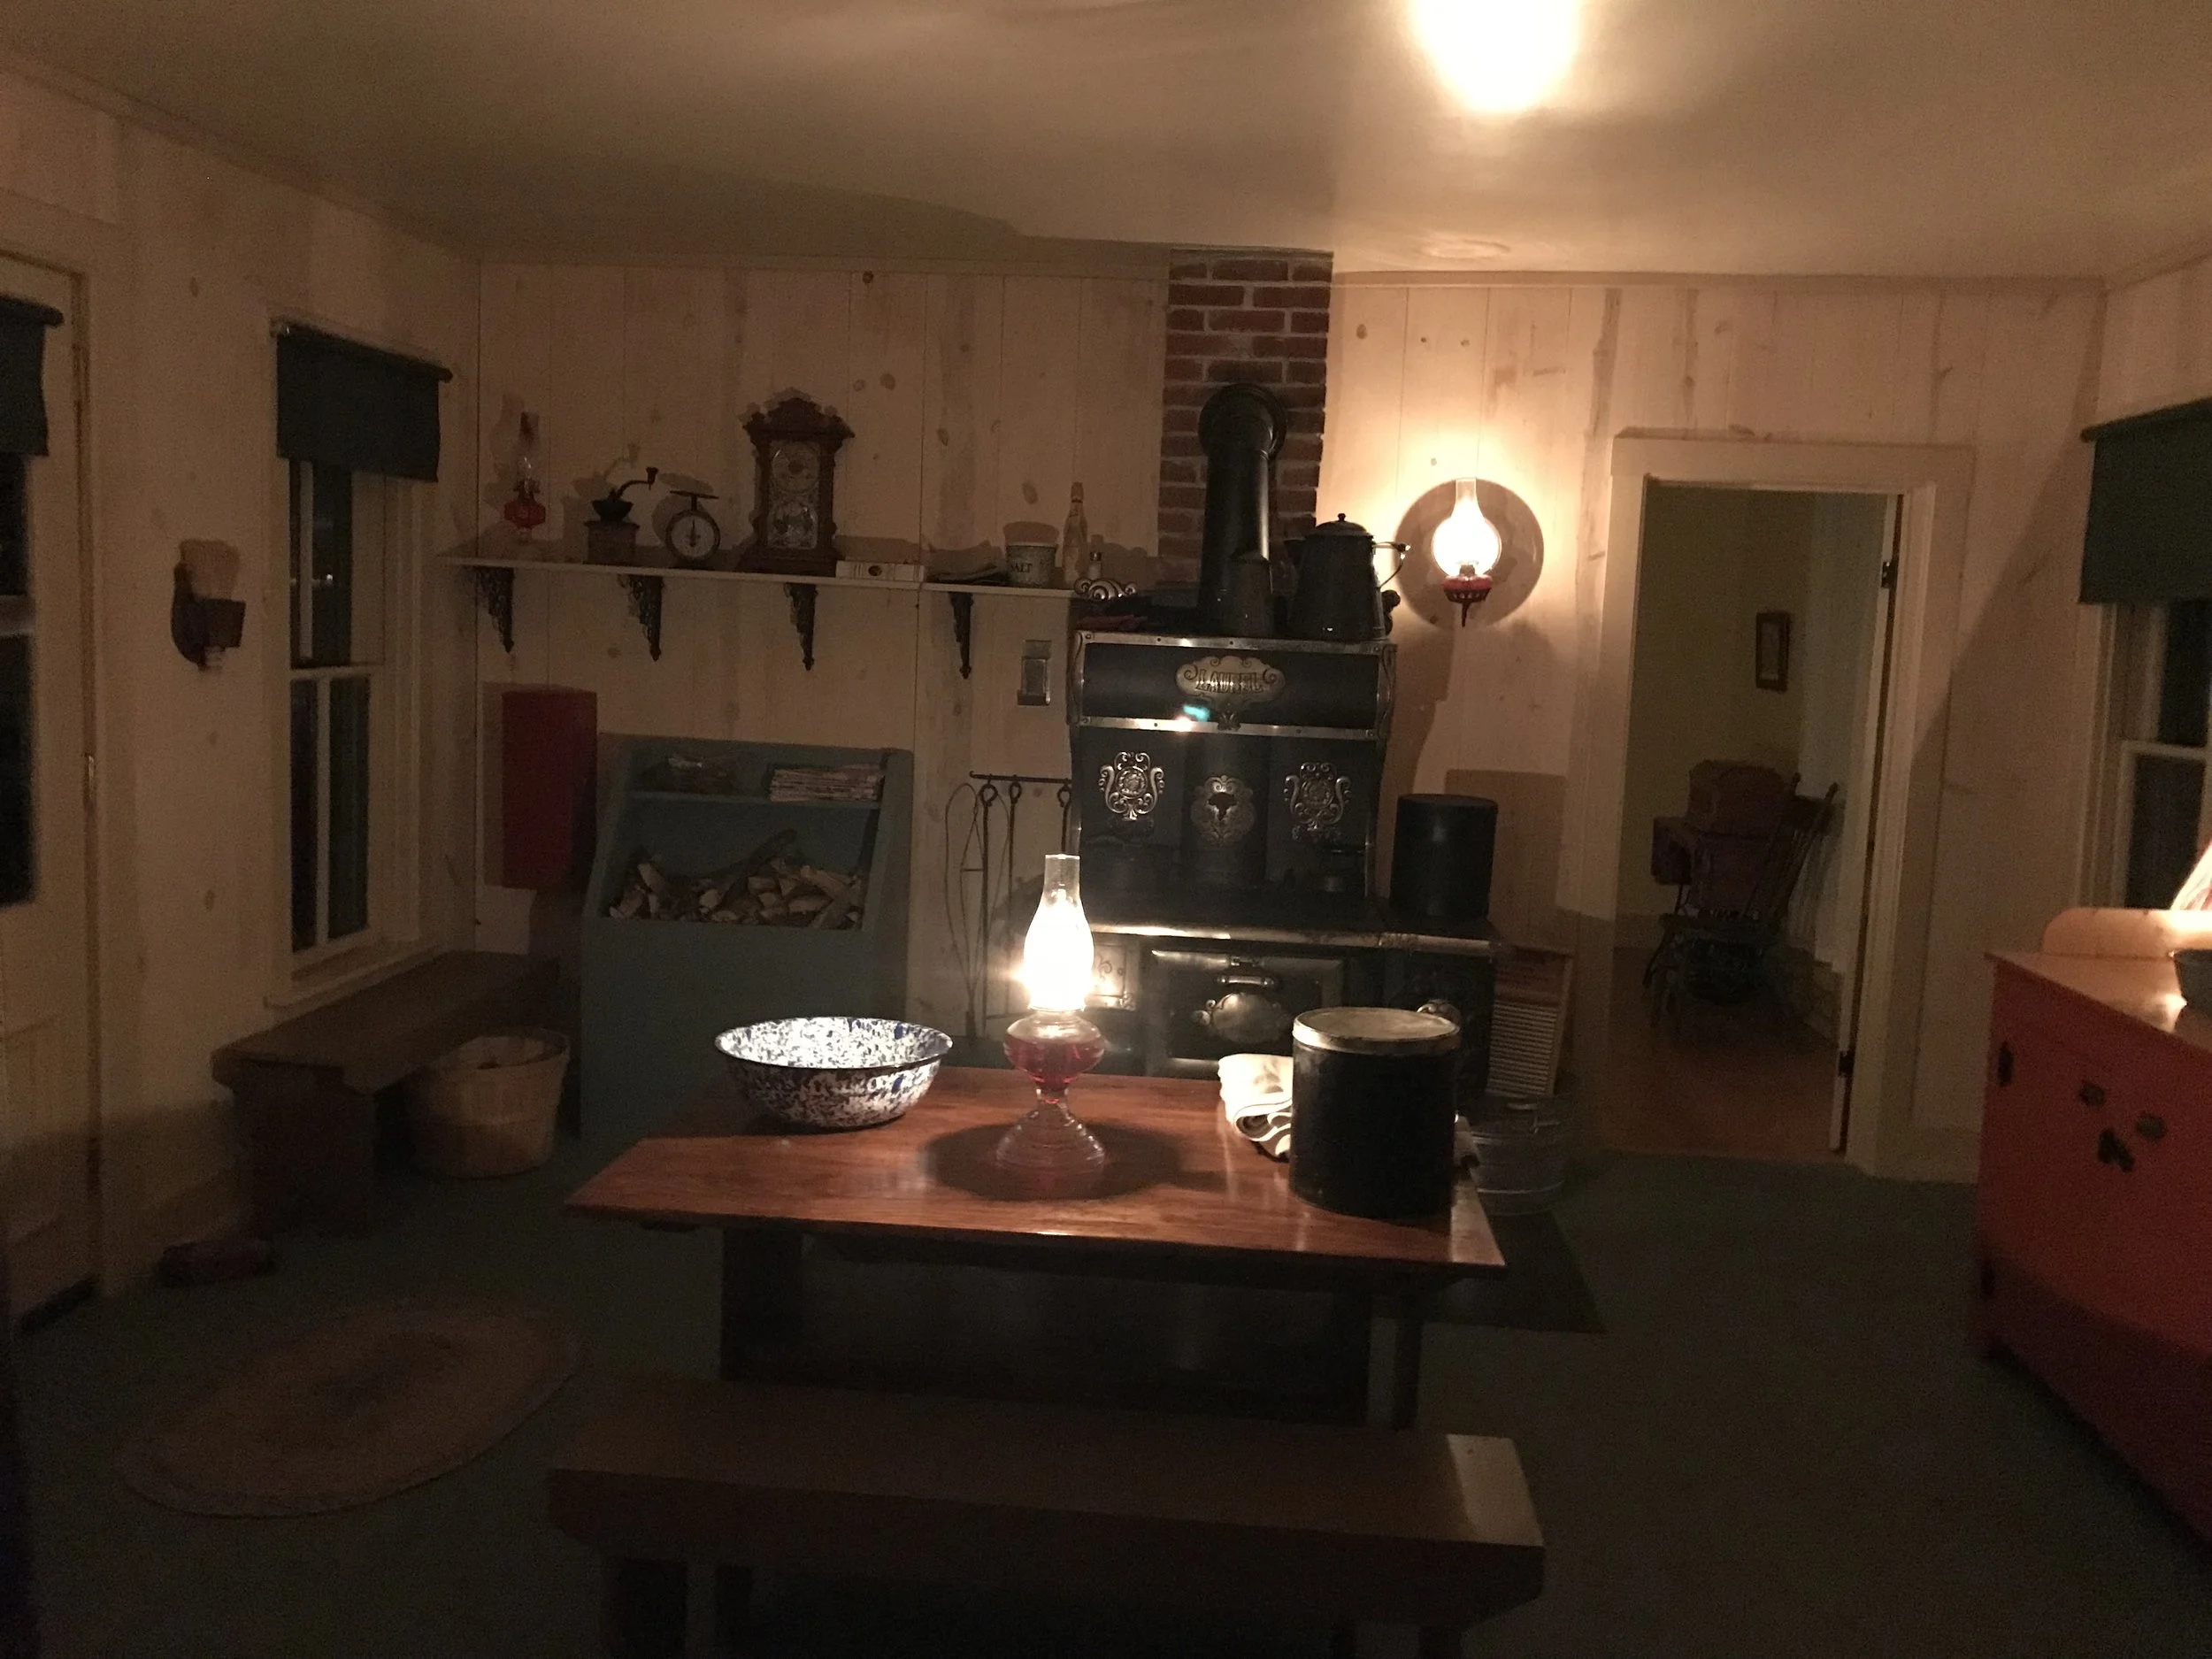
In 2018 we worked hard to get the house ready for her first Winter on The Plains class which was held there on November 28th. Then of course there was all of our Christmas Past and Present evenings in December. It was a true joy to share this house dressed in her Christmas finery for the first time that year! From there we moved into 2019 and the winter class called Pioneer Living. It was during this time, we experienced trouble with the Laurel stove, as she would regularly smoke up the house and not draft correctly. We made it through the summer with minimal cooking and when it was time for classes again in November, we were hopeful. A few more occasions of the stove smoking out classes in the house occurred and we knew that Laurel needed some serious attention. Deep research on the workings of this particular model of stove ensued and we pulled apart the fire box. The fix that had initially been created when we originally set up the stove was just not working. Also noted was the fact that all the stove bolts for the top were missing and a collection of bolts were ordered in December. The original cast iron innards of the stove firebox were still at hand - they were resting on the floor behind the stove. They had some serious issues and would not work. They would have to be recast. Fortunately, we connected with Mr. Kump at the Spitz Foundry in Hastings, Nebraska and he agreed to come over and look at the stove and the parts in January 2020. Upon his visit he stated that he could indeed cast new parts for us, but new patterns would need to be created. Fortunately for us, Mr. D. Deitemeyer, a museum board member, is quite skilled at making patterns for cast pieces! He took the original two pieces that needed to be replaced and created the cast patterns. Once he was satisfied with the patterns, he delivered them to the foundry for casting in March.

Then Covid changed the world, and we had to change how we approached everything. We were closed here until June, but work continued on many things behind the scenes - even the casting of stove parts. They were delivered to us on May 1 but would have to wait for fitting as there were so many things happening in order for the museum to reopen. We had not planned on doing any cooking in sites for the summer at any rate, and the status of any in site classes was truly up in the air. It would not be until November that the stove would return to the top of the list. Mr. Roberts worked to do some final fitting of the parts, and Mr. Oshlo worked on a cast weld to repair another area on the top of the stove. That final piece sits in the office here right now, and as I was writing this Mr. Oshlo came in to see how the two small patches I did with the extreme heat metallic repair paste were doing. Satisfied with the patches, Mr. Oshlo has taken the part for Mr. Roberts to reassemble the stove! We want to make sure that we have all the pieces solidly in place before we fire the stove again and the holidays are looming large, so I will not be able to do a test firing until early January 2021. I plan to put Laurel through some paces by making a whole meal. I will let you all know how that goes. She needs to be working well - after all, we have some big plans that involve Peter Stuhr House and Laurel the stove in 2021. Stay tuned!


Laurel sure is pretty.

Laurel sure is pretty.

A Little Bit of Magic.

The Tree with Gifts in the Parlor.

The Tree with Gifts in the Parlor.

Tonight, I had the opportunity to experience a little bit of magic.  I know that there is a great deal to be caught up on with this blog, but I wanted to take this moment to share the magic. On Friday night of this week, the Peter Stuhr house will be open for the first time during our Christmas Past and Present event at the museum. The lamps were filled with kerosene today, so after a little bit of baking, and patiently waiting for the sun to go down, I made my way to the house to light the lamps for the first time. Now, this was done with the thought that I needed to see how the lamps lit the rooms and to see if there would be any areas lacking, since we usually have hundreds of visitors over the five dates of this event, and we want them to experience the lighting of the period, and still be able to see things.  Once the lamps were lit, I was quite pleased, feeling very warm and fuzzy. I was able to take some acceptable pictures of the lighting, all of the images presented are without flash, and sum might be a bit grainy, but, I think you get an idea of what the rooms look like. I now know that I will need to trim all the wicks a little more carefully, and that I may have one problem lamp, but we should be able to welcome visitors to the house for the holidays in a very merry way.  There is another first happening very soon, and I intend to get caught up with what has happened since the spring once I get a few days off. Until then, enjoy these pictures, or better yet, come out to the museum during the Christmas Past and Present event and see for yourself!

Another look at the Parlor

Another look at the Parlor

The Kitchen proves to be quite bright!

The Kitchen proves to be quite bright!

A look at the stove.

A look at the stove.

Looking back towards the parlor.

Looking back towards the parlor.

Looking towards the pantry. I REALLY like how the kitchen looks!

Looking towards the pantry. I REALLY like how the kitchen looks!

A peek in the pantry.

A peek in the pantry.

The back bedroom.

The back bedroom.

Suddenly, It's Finished!! Well, sort of...

Last Tuesday the concrete walkways were poured to the Peter Stuhr House. Yes, I realize that the last time I wrote an entry - about 5 months ago - we were in the thick of all of the interior work, but guess what? They are done! That is right, since we had a relatively mild winter, which meant that the maintenance team working on the house did not spend a good part of the winter moving snow around, they were able to concentrate on all of the interior work of the house and now they are done!! That's right, the walls are finished and painted, ship lap boards are in the kitchen and pantry and pickled, there are new floors in three rooms and the other two are painted, widows and doors trimmed out, new doors made to the parlor, pantry and pantry closet and stairs made to the cellar. (Check out Project Pictures - Interior work) With the concrete work finished to the entry points, that only leaves shutter construction for the windows on the exterior of the house - but these will be completed in the fall. Other items that will need to be added to the yard of the house will be a privy, clothesline and assorted plantings. We have a good start on plantings so far, with the donation of a few lilac bushes enjoying at least their third move - they were originally from the grounds of the Nebraska Veteran's Home, and had been moved to private property just across the street from the home sometime in the 1950s or 60s. They are already getting a good start and are located on the north side of the house. On the south side there will be three trees planted, and in fact one is already in the ground and has been enjoying all the rain we are having.

Ok, well the interior construction is done, but we are nowhere near ready to receive callers to the house just yet. Now for a new challenge - the artifacts. Over the last several years, we have been working to identify artifacts to go into the house. We were quite lucky early on with the donation of a functional period cook stove for the kitchen. This will quite likely be the very first artifact we move into the house, since it will be a good deal easier to place everything else in the kitchen once the stove is set. The Hall County Historical Society also has a setee for the parlor that will need to be picked up soon. We can't just plop everything into the house. We have to identify needed items and donations must be processed (descriptions written, photographs taken and numbers applied). We want to identify as many artifacts from our collection to put into the house as we can. All of these items will need to be designated as use items. The items placed into the house must be serviceable for both interpretive and educational use since the house will be both an interpretive site open to the public, and will also be used for HATS classes (Heritage Activities for Today's Students), specifically for the second grade Winter on the Farm and the 4th grade and up Pioneer Living classes.

So now it is on to the furnishing plan. This plan will be a story about each room in the house, looking at how rooms will be used and what artifacts will need to be in each room to help tell the story of the house and the past. This will be all about what and why for each artifact. In many ways, this is very much like setting up housekeeping for the first time. We will need furniture, such as beds, a desk, an icebox, tables, chairs, a sewing machine and cupboards. We will need soft furnishing - textiles - sheets, curtains, pillows, towels, blankets. And we will need the things that make a house a home, like books, pictures, lamps and kitchenware. As we work through items in the collection, I will continue to share interesting things about some of the choices we will be making. This will be fun!

Sensing a Pattern Here…

It has been just a bit over a year since the last time I posted a blog entry. I am sensing a pattern here. Yes, my time during the year is quite well occupied, and it seems I always end up playing catch-up during my vacation time at the end of the year, or into January of the following year as it is now. Well, if this is the hand I have been dealt, I will attempt to make the most of it! A lot changed at the house in 2016, but progress came in fits and spurts. I will try and go back through the year and bring you up to date.


Chimneys

New Kitchen Chimney

In April, the time had finally arrived for the chimney work. We knew that the kitchen chimney would be the most critical of all of them, and upon inspection, we learned that a chimney liner would not fit down the existing chimney. It was also painfully clear that the chimney had seen better days. So the original chimney was removed so that a safer chimney could be built in its place. The right hand chimney on the front portion of the house had been rebuilt at some point, but there are not plans to use this chimney. We are unable to replace the original interior wall in the front portion of the house that originally hosted a narrow – very narrow – hallway that separated the two rooms of the original structure in the manner of a dogtrot house. We did, however, want to return the exterior to the look of the late 1870s as shown in the earliest image we have of the house that was taken shortly after the two cabins were merged. This showed two chimneys on the front portion – one left and one right - one for each room. In working with the chimney contractor, it was decided to create a faux chimney on the left hand side (as you ace the house). All of this work needed to be completed before the roof could be shingled. The chimney contractor made quick work of constructing the new chimney and the faux version, and his work was done by the end of May.


A Bonus Find

Concealed Shoe Location

In documenting the condition of the chimneys before work began, I once again headed upstairs to take as many pictures as possible in April. It was cool enough to be able to stand to be upstairs, and yet warm enough to take my time taking pictures. I was rather hopeful that since we had found the bottle earlier in the project that perhaps there might be other treasures waiting for us. I was not disappointed. After photographing the chimney over the kitchen, I decided to document as much of the upstairs as possible for use in a photo album that could be used interpretively once the house was open since we will be unable to allow access to the upstairs to the public. Photographs were taken of walls, chimneys, floors, hardware and the like. I paid particular attention to the area where the two original structures were joined and had a flashlight on hand so I could peer into the darkest corners. Of to the west side of the door between the two portions I noticed something odd stuck in between the areas where the buildings joined. It was carefully placed at a distance from the door so that it would not be easily noticed. It was a reach, but I was finally able to fish the shoe out. Yes, it was a shoe! Or in this case a concealed shoe. Concealed shoes, as well as other items, have been found in homes all over the world.  Those who study concealed shoes document that they are often placed as a protection for the house from evil influences, ghosts, and the like.  There is even a Concealed shoe index that is maintained by the Northampton Museum and Art Gallery in England. http://www.northampton.gov.uk/museums

Concealed Shoe

It is a registry of concealed shoes found in structures all over the world. There is a lot of interesting information available concerning concealed shoes and I encourage you to read some of the information that is available. I plan on looking into registering our concealed shoe. We have not yet determined if it will go back where it was, or if it will be replaced by another shoe.


Ramp

Access ramp on the South side of the house

Since the house will be used for both interpretive and educational programs, we need to make the structure as accessible as possible. Brian Roberts, who has done the major amount of work on the exterior of the house, was able to complete a handicap accessible ramp on the west side of the house in April. The ramp will be accessed by a concrete walkway from the front of the house and will make it possible for wheel chairs and scooters to easily enter the house on the west side. The access deck is commodious and allows for easy maneuvering of wheel chairs. There is also a short set of steps of the back of the deck area to allow interpreters and teachers access areas yet to come, such as the water pump and clothes line.


Roof!!!

New Roof!

One of the most exciting things to happen this year was the old asphalt roof was finally replaced with a shake cedar roof! As the old roof was removed, so too were the remaining signs of modernity – the vent stacks for plumbing and the extra metal chimney for a wood stove.


Interior

Interior - Looking to the Pantry

With the roof safely on, it is now possible to move to the interior and begin work there. As 2016 came to a close, this effort was just beginning with then removal of some of the lath and plaster areas in order to make a door wider to allow full access of rooms in the house.


What's in store for 2017?

As the winter continues, work will continue on the interior of the house, repairing walls and floors, painting walls and ceilings and cleaning and returning to position the original door and window trim.  On the exterior, sidewalks must be put in place and a planting plan considered. The final exterior addition on the house will be returning shutters on the windows in order to complete the look of the house in the late 19th century. Once all of these things have been completed, then, and only then, can artifacts be moved into the house. That will be a very exciting time!


A Very Progressive Year

Peter Stuhr House December 2015

Peter Stuhr House December 2015

At the end of last year, progress had been made on two sides of the Peter Stuhr house, with repairs to the window and door openings and new, freshly painted siding and trim sprucing up the north and west sides of the house. As we moved into winter, progress came to a halt as the realities of harsh winter weather set in and the need for museum staff to focus on the many things that needed to be accomplished in order to be ready for the grand reopening of the Leo Stuhr building after over a year and a half of being closed for renovation. In July of 2015, the Stuhr building was reopened to great celebration, and attention could once again return to the Peter Stuhr house and the two remaining sides needing attention and siding.

South Side Back Section

South Side Back Section

By the end of July the windows on the south side of the house were being restored or reconstructed depending on the degree of degradation they had suffered.  The back half of the house was in relatively fair shape, and the refitting of the windows progressed rather quickly. Since this side originally had a door out of the kitchen area, a door was once again set in place of one of the windows. This is the side that will have a ramp access to the house, and a good solid door was needed, but did not want to loose the light from a window, so a proper sized period door with a window opening was found and restored for use in the house. Once the door and windows were re-installed, the siding went back up rather quickly.

Damage Detail

Damage Detail

South side Front Section

South side Front Section

As easily as the back section of the house went back together, the front portion of the south side would prove to be the most challenging. Since this section had faced the north for around eighty years, it bore the brunt of the weather damage. At one point vinyl siding was installed over the wood siding. I realize that many people view this kind of siding as a way to protect a house, but more often than not, it contributes to deterioration and hides problems that should be immediately addressed. As Brian Roberts removed more and more of the siding, more and more very distressing problems were revealed.  This is the section that was lined with original adobe bricks as described in the Egge Diary. In areas that had been compromised and exposed to weather, the bricks were affected and large portions washed away. Wood rot was very evident, and the original construction showed minimal support for the window openings. The challenge was to repair or restore as much as possible, while saving as much of the original as we could. What Brian found were windows that were not the same size or even set at the same level. As he moved higher up on this side, the original adobe had been replaced with red bricks above the windows.

The good news was that the higher he got on this side, the more good original vertical siding he found that he was able to leave in place. This section took the most amount of time to restore, but the end result was well worth the time.  By the end of September of this year, the south side was finished. Only one side left to go.

Flask Bottle from the house

Flask Bottle from the house

Brian did not waste any time and moved around quickly to the East side in early October. It was here that we saw the best example of the vertical siding described in the Egge diary description of the original settlers cabins. Very little damage was evident on this side and the resetting of the windows went quickly. The exposure of the original siding allowed us the opportunity to photograph a good deal of the original construction evidence. There were cut nails everywhere!

On the 7th of October Brian stopped in the office with something that had fallen out near the top of the east wall close to the eave. It was a flask shaped glass bottle! Quick research dated the flask to the 1845 to 1860 period. The cork was still intact and residue of the contents – quite likely alcohol – was still inside. It was very lucky that the bottle enjoyed a soft landing when it fell to the ground and is a lucky treasure to have as a part of the houses history.

Detail of an east window opening

Detail of an east window opening

The reconstruction of the east side went rather quickly when compared to the amount of time spent on the south side. By November 3rd, the east side was mostly completed. Windows installed, siding and trim up and painted. The good fall weather we enjoyed allowed Brian to complete not only the siding, but also the front porch as well as the stoop off the north side.

A great deal was accomplished in five months time in 2015. In the spring I am sure that the final porch on the south will be completed in a very timely manner. From there it will be on to chimney reconstruction and a new roof. I am sure we will have some very exciting progress to report in 2016!

It's Been A While, But There Has Been Progress

North side of the house with its new color.

North side of the house with its new color.

A number of factors have kept me away from the blog for a while, and the reasons don't really matter, but it is time to bring you up to date on the progress with the house.  We are at the time of year where not a great deal will happen, and I will probably go back and write some of the other posts I have planned on the initial demolition and examination of the house. The end of summer saw a great deal of progress on two sides of the house. All of the windows and frames on the north side of the house as well as the door were worked over, and siding either repaired or replaced if it was too far-gone. A body color was selected to compliment the previously chosen trim color, and was applied to the completed work. If you go back through the previous pictures, you will notice what a change this has made in the look of the house. The door on the north was also finished and received an initial coat of paint, allowing us a second access point into the house. With the door completed, we were also able to move the entry steps to the north side in order to be out of the way for work on the east side.

West Side.

West Side.

On the west side was more of the same, with repair or replacement of the siding and paint. One change was the replacement of the door that was at the attic level on the back with what we feel would have been more likely - a window that mirrors the ones on the north and south sides. There were no other windows on this side, making this probably the easiest one to work on of all the sides.

It is important that we prime and paint each section as we move around the house in order to protect it. After all, it may be a year or more before we finish working our way around the house, as the completion of our main exhibit building restoration and the subsequent installation of all the new exhibits will take a front seat to most of our activities as we move into spring and early summer 2015. This does not mean that work will come to a complete halt on the Stuhr House; it just means that things will be going slow for a while.

It is very tempting to want to run in and work on at least one of the rooms, and that may happen if time and weather allows. After all with the completion of the siding on the north, that means that at least one room - the pantry - could be completed as there is no longer anything that could impact it from the exterior - except for the roof. This, and this reason only, may keep us from doing anything inside just yet, as it would be a waste of both time and money to do interior work before we know with certainty that it will not be damaged by a possible leak.  The nice thing is, we are still able to work on plans for how we will finish interior rooms, assemble artifact lists and work on a furnishing plan. I must say, it is very inspiring to drive towards the house from the north and see at least that much of the house looking good. It makes me excited to see what will happen next.


New Openings

The window is out! Ready to become the new south door way.

The window is out! Ready to become the new south door way.

It has been a couple months since the last post. Many things conspired to prevent my posting, including the loss of use of the computer at work (long story), and the loss of all the pictures I have taken (associated with the previously mentioned long story).  There were also many events, and a few other changes, but here we are and it is time to get back to writing! Now despite the fact I could not get things written, the project did not come to a halt. Quite the contrary, there is great progress to report, and this post is dedicated to some of this progress – New Openings! I will try and write a number of posts in the next couple weeks in an effort to get back on the timeline I had personally established, but now, on to news!


Window out of the frame.

Window out of the frame.

Just before the Fourth of July, following the leveling of the ground after the completion of the foundation, the big hole in what will be the pantry floor received a sub floor! This was a critical first step on the road to fixing and adding openings on the house. The original door on the pantry side was half set in the previous foundation, and a new opening would require raising the opening to accommodate the new north-facing door.  The new opening happened almost faster than I could take pictures, and was a very welcome site. It meant that we were moving forward.  In short order the opening was enlarged, essential framing was in place and the opening was ready to receive its new door. But now Brian from maintenance was around on the south side, removing the window from the opening that would eventually become the new south door! The window came out quickly, and it proved to be in rather poor shape, but the weights were intact and essential parts of the frame were good, so this was set aside while Brian made the new opening on the south for the door. This door will be very important, as this will open onto a porch that will have a ramp for accessibility. As Brian took out the frames and reworked the openings you could see the original timbers, and in the case of the south opening, all the layers of the kitchen floor. Four total layers in the kitchen area. This explains why this floor is so much higher than the rest of the house, and explains some of the difficulty I had with nail removal — but more on that later. 


Enlarging the Pantry window opening.

Enlarging the Pantry window opening.

Now that the door openings were made Brian moved on to opening the window area in the pantry. This area was a former bathroom, added in the 1930s, and there had been a small, square window in this area at one point. The opening was extended to accommodate the window removed from the south side. This will be critical for light in the pantry area since this house will not have any electricity.


Once the new openings were made, Brian began to work on rebuilding the window and preparing the doors for installation. But that will be a part of an upcoming post.

Foundations


The foundation from the back side.

The foundation from the back side.

  Something really exciting happened the week before last. The foundation on the house was finished! In two days time the project went from being very much on hold, to finally able to move forward. The foundation is the key to everything that happens with the rest of the house, and with the brick work finally done, the dirt can be worked around the house and plans can be made for little things like porches and an accessibility  ramp. Once that work is done, then grass, trees and flowers can be planted, the clothesline, privy and pump can be set and the fence can go up across the front of the house.  Of course we will have a little bit of work yet to do on the inside of the house, and then there is the siding and the roof to work on, but having the foundation in limbo has held all of these things up.  It was not due to any one problem or person, it just happened that way.

   This house has known several foundations in its lifetime. As to the first foundations the cabins originally sat on, we do not really know. That part of the description was not in Heinrich Egge's diary. We do know that the major support beams under the house are quite large, but what was put under them remains a mystery.

   If you look at the photograph gallery that show the house at various points in time, you will see the brick foundation from about the 1880 period just after the two cabins were joined together. This foundation was quite high, and it required the side and front porches to be several steps up from the ground level. Tall brick pillars at the side porch appear to be about waist height of the woman in the picture and there are seven steps up to the front porch.

   In 1920, the photographs show the house sitting on a new foundation of large concrete blocks — not the plain ones we are used to seeing today, but the ones that look to be carved as if to resemble stone. It looks like there are now five or six steps up from the ground to the back porch and a similar number on the front.

   In 1932 the house is moved away from the open sewer ditch and relocated on the Stuhr property, gaining yet another new foundation. This one is very similar to the previous foundation, with concrete block that attempts to mimic stone, and five steps up to the front porch. The side porch is gone, but the new side entrance on the opposite side boasts a door that is set half way in the foundation and half way in the new side addition. This is the foundation the house sat on when I first visited the house. It was a very sturdy foundation, and there was support under all the key locations under both cabin areas.

  In 2010, the house was moved from its foundation, and for the next two years would rest on steel beams and wood cribbing in a city holding area while it awaited its fate. This was a precarious time for the house, and the underside of the building was exposed to the elements. No doubt this played a role in all the nails that were driven in the floor rusting, and that made them soooo easy to pull out.

   When it became clear that the house would be moved to the museum, a red brick foundation was chosen to resemble the foundation the house sat on in the 1880s and 90s. The red brick faced a back wall of concrete block, with the concrete block providing the bulk of the support for the structure. Red brick can be very soft, and would in time deteriorate under the load of the house.  In December of 2012, the majority of its new foundation was ready on the museum grounds. I say majority because when you move a house you have to leave spaces for the steel beams to nestle down so that the house can finally come to rest on the foundation. The house movers were very efficient and the house found its way onto the grounds on one day and was safely perched on her foundation the next. December is not a good time of year to finish brick work, so completing the foundation would have to wait. 2013 say some work on filling the holes in the foundation, but there was not enough brick.

   Finally in the spring of 2014, more of the brick needed to complete the foundation was acquired and in June, the foundation was finally completed. Hopefully, this will be the last time that the old girl will need a new foundation, and now we can get busy on everything else!


Those Cabinets Have GOT to Go!

A few of the cabinets.

A few of the cabinets.

How hard can it be to take down a few kitchen cabinets?  Like a lot of people, I had watched my fair share of home rehab show on television, so I thought, probably not that hard, right?  Come to find out, it can be that hard, especially when that cabinet had been built in place in the kitchen. 

On the first day that I had available to work in the kitchen last February, I walked in and decided to approach it with a plan.  I hoped that this plan would make the opening salvo of the demolition phase a walk in the park.  To begin, I started with removing all the hardware.  Not a lot to take off, you think in the beginning, but that is quite deceiving. There were 19 cabinet doors and 7 drawers, thirty-eight hinges, 19 latches, 26 handles and a total of 356 screws just for the hardware. It took a bit more time than I originally considered removing it all. Thankfully, my husband had given me a nice power drill set for my last birthday, and this helped to make the job easier than if they all had to be removed by hand. Soon, almost all the cabinet doors and drawers were stripped of hardware and the doors and drawers set aside to be removed from the site.  And I had a twenty-pound box of metal hardware to recycle.

All that was left was the framework of the cabinets. I decided to get the lower once out of the way first. The two small side areas came loose from the wall quite easily, with just a little work with a pry bar. They were held in place by nails rather than screws, and the nails were not that well set. Easy! This would be a breeze. But wait. There was a large yellow cast iron sink in the largest section of the lower cabinets. I made a few attempts at prying this section away from the wall, but alas, the pipe attached to the sink would not allow anything to budge.  Time to take on the upper cabinets.

Stepladder at the ready, I approached the smallest piece first. The cabinets were nailed to the wall in this case as well. They used a lot of nails, in both the back wall and the ceiling, and it took a great deal of prying just to get the first part loose. Levering the cabinet back and forth it finally came free and landed with a thud on the floor.  O.K. this just might work! I moved down the line on the small section and one by one they fell to the floor. There were random areas of thin plywood in a few areas and once the cabinets came loose, they were easily removed.  There was framework around the chimney area that had been built out to make the wall flush. That was gone in a flash.

Once the first upper cabinets were removed it was obvious that the ceiling had received a second layer of drywall as lovely cutout areas now glared back at me from the ceiling where once there were cabinets. I decided that now was not the time to worry about that, and would address it another time.

Now all that remained was the sink section and the large cabinets above that area. I tried to loosen the upper area, but the prospect of this large section possibly falling on me rather than the floor prevented me from going too far.  It was obvious I would need help. I would have to fight this battle another day.

A few days latter, I was able to convince Mr. Oshlo and Mr. Dack to take a look at the situation. In no time at all they had the sink disconnected and the lower cabinet loose. It came out and revealed old thin plywood underneath that was easily removed. The upper cabinets were right up next to the chimney and this required a more careful touch to keep from damaging the chimney too much. It was loose from my previous attempts to pry it from the wall. A few good tugs and the large upper cabinet were soon on the floor along with all the other pieces.

The walls that had been hidden for so long now revealed everything. Lots of large holes from electric boxes, venting attempts, cracked plaster, and a bit of chiseling out along the chimney that will have to be repaired in order for the chimney to be used.  The various hills and valleys of the floor were now more pronounce where they had once been covered over by cabinets.  At least now we had an idea of what we would be facing in this room. This room will be a lot of work.


Getting Started.

Jess standing as a reference in front of the Peter Stuhr House.

Jess standing as a reference in front of the Peter Stuhr House.

This is going to take a while. I am talking about getting this house ready to be open.  I had driven by this house almost all of my life. I knew it was there, over by the meat packing plant, but didn't think much of it.  Later, when I began working at Stuhr Museum and became more and more immersed in the history of the museum's beginnings, I learned it was one of the original settlement cabins, and I knew that the museum was once supposed to be built near this house and that it would be a part of the museum, but with all the work here at the museum and in Railroad Town, I still wasn't thinking much about the house. Until the phone call came. One rather cool late winter day in March of 2010, Jess Waite in the Research Department called to say that the J. B. Swift meat packing plant wanted to move the house out of the way in order to make a parking lot. Could we come over and take a look at the house?  These opportunities are not lining up every day, so of course we headed over - with my camera - to take a look at the house.  At the time, I did not believe - though I greatly hoped - that the house would ever make it to the museum. Its significance to Hall County History is undeniable, but there are rules about accepting new structures at the museum, and they are very good rules that help us be responsible caretakers of the artifacts - buildings included - that we care for. I had my camera, and I might never get in the house again, so I was going to take as many pictures as I could.

We met the Swift representative at the house and and went inside to start our tour.  They had heard that it might be a really old house and wanted confirmation. We headed down to the basement area first. One look at the structural support beams confirmed what I already knew - this house was a very old structure.  We snapped several images of the basement beams and underfloor then moved upstairs to the main level.  It was a very simple layout. Front living room and bedroom, closet under the stairs, a large kitchen, back bedroom, bathroom and a side area with a small closet and access to the outside and the basement.  The whole things looked like it had been decorated in the 1970s. The front bedroom and living room had exposed beams and you could see the underside of the floor of the attic area - it was all open.  The kitchen and back bedroom had finished drywall ceilings.  We next moved through a hidden door behind the bookcase in the living room to access the attic area.  This is where we got the really great surprises. The upper area had been sectioned off to two rooms over the front part of the house. there was a wall and door of vertical boards just to the right as we climbed the stairs. The hinges on the door were 19th century, as was a hook located on the wall. The rest of the front was open. We could see the brick chimney that was accessible from the front bedroom area. As we looked around this area, we could see the framing for the second chimney that had once been located in the living room area.  We were just a little excited. Ok, perhaps I was a little more excited. As we turned to the back area of the house we saw where the two cabins had been joined together. The sloped roof was still there - with shingles! There was a door to another room that was the area over the kitchen and back bedroom. In the door area we saw the vertical boards that came up from below and pieces of adobe brick that were reportedly lining the inside of the walls below.  These were described as construction aspects of the original settler's cabins in Heinrich Egge's Diary. Again, very excited!!

After touring the house we moved outside and took pictures of the exterior and the barn that was also located nearby and was to be moved. Since were were taking documentation pictures, we grabbed some of the barn as well.  As Jess and I drove back to the museum we discussed the possibilities for use of the building should it come onto our grounds, but we were aware that this might be a very remote possibility. As it turned out, it did not come to the museum at that time, it was instead given into the care of the Hall County Historical Society and was soon moved over to a City of Grand Island lot for safe keeping while its fate was being decided.  I avoided driving down the road the house had sat on for well over a year. I just could not look at the spot knowing that the house was gone. I did not want to think about the house.

Time moves forward and sometimes things just happen.  In the fall of 2012 a number of things fell into place and the Peter Stuhr house would be moving to the grounds of the Stuhr Museum after all. In December of 2012, with its new foundation sited across the street from the birthplace of Henry Fonda in Railroad Town, the Peter Stuhr House came onto the grounds. Within about three days the house was safely set on the foundation.  The time had come to start thinking about the house.

In the late winter - early spring of 2013, parts of the foundation were finished enough to allow a set of stairs to be placed up to the front door. In April of that year, the museum hosted an open house with the house in its raw untouched state.  Plans of how the house would be used once it was restored were made and exhibited that day, and posters citing a list of needs for each room were placed about for visitors to see. The only things that had been removed from the house were a harvest gold kitchen stove and a very large wood burning fireplace from the living room. The modern kitchen set up, bathroom and carpeting remained. This was an opportunity to show that there was a good deal of work ahead.  Floor plans would be made and work would proceed as time, help and funding allowed.

In the late fall of 2013 exterior vinyl siding was removed on two sides of the house exposing the wood siding underneath.  So far, so good. It did not look terrible, but there were obvious areas needing repair and replacement.  No work had yet been done inside.  In the winter months of 2014, I asked if it would be ok to start taking out some of the cupboards in the kitchen and was given permission. It was a cold winter, so work days were limited, but work began as time allowed.  But I am getting ahead of myself here now. This is what this blog will be about - the process of taking this raw, modernized house and restoring it to a 19th century version of itself. So far we - my daughter, Laura, has been very excited about helping with some of the demolition - have spent about six or seven days in February, two or three in March and a couple in April working to remove the modern, and for the most part this is all done.  We have moved carefully. This is demolition archeology. We have to take the layers back slowly and document often so we don't miss any clues. But I will be writing about this over the course of the summer of 2014. I will take various aspects of the demolition that is now done and write about what we found or experienced. And there will be pictures. Lots of pictures.

I hope you will enjoy traveling with me as we move through this process. It is more that just taking out the new, painting the walls, moving in a few artifacts and opening the doors. There will be so much more than just that. Once completed the house will be used to help the museum meet its mission, and by taking you through the process of restoring and later interpreting this site, we hope to show you just what it will take to make this possible.